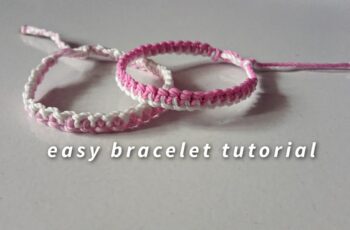
Friendship bracelets are timeless. They’re a fun, personal way to show someone you care, and they’re a fantastic craft project for all ages. While there are countless variations, a heart-patterned friendship bracelet is extra special. It symbolizes love and affection, making it the perfect gift for a best friend, family member, or that special someone.
This tutorial will guide you through the process of creating your own heart friendship bracelet. It’s a beginner-friendly project, so even if you haven’t made many friendship bracelets before, you’ll be able to master this technique with a little practice.
What You’ll Need
- Embroidery Floss: Choose two colors that complement each other. For example: red and white or purple and white. You’ll need about 60 inches of each color.
- Scissors
- Tape or a Safety Pin: To secure the bracelet while you work.
- Ruler or measuring tape
Getting Started
- Cut Your Floss: Cut 60 inches of both of the colors you will be using.
- Tie a Knot: Gather all the strands together and tie a simple overhand knot at one end. Leave a few inches of floss above the knot for tying later.
- Secure Your Starting Point: Tape the knotted end to a flat surface (like a table) or pin it to your pants. This will keep the bracelet steady while you braid.
- Arrange Your Strands: Place the colors in an alternating pattern.
Making the Heart Pattern
The heart pattern is created using a series of knots. Here’s how to do it:
- Forward Knot: Take the leftmost strand and make a forward knot onto the string to its right by forming the number four shape with the string, and pulling up to tighten it to the top.
- Repeat Step 1. Continue forward knotting on each string until you have made a row.
- Backward Knot: Take the rightmost strand and make a backward knot onto the string to its left by forming the backwards number four shape with the string, and pulling up to tighten it to the top.
- Repeat Step 3. Continue backward knotting on each string until you have made a row.
- Continue: Alternate Steps 1 and 3, to create the heart pattern.
Finishing Your Bracelet
- Desired Length: Once your bracelet is long enough to fit comfortably around the wrist (about 5-7 inches, depending on the recipient), tie another overhand knot to secure the end.
- Finishing: Braid or split your string into two, knot the ends and finish with a bead to make it look more complete.
Tips for Success
- Practice Makes Perfect: The first few rows might be a little tricky, but don’t get discouraged! As you get the hang of the knotting technique, the heart pattern will become clearer.
- Keep Tension Consistent: Try to maintain even tension on the threads as you knot. This will help create a neat and uniform pattern.
- Get Creative with Colors: Experiment with different color combinations to personalize your bracelets. Consider the recipient’s favorite colors or colors that have special meaning to you both.
- Add Beads: Once you’re comfortable with the basic heart pattern, you can add small beads for extra flair. String the beads onto the floss before knotting, and incorporate them into the design as you go.
Show Your Love
Making a heart friendship bracelet is a meaningful way to express your affection for someone special. It’s a small gesture that carries a lot of love, and it’s a fun project that you can enjoy creating. So, grab your embroidery floss, and start knotting a heartfelt gift that will be treasured for years to come!

Additional Ideas
- Make a matching bracelet for yourself and your friend.
- Use different shades of the same color for a subtle, monochromatic look.
- Try making a heart friendship bracelet as a fun party activity for kids.
Happy crafting!

